To set up a solar panel system, I first calculate my power load by listing all devices and their wattage. Next, I choose the right solar panel array and type based on my energy needs. I select a portable power station that matches those requirements and purchase balance system components like a charge controller and inverter. After mounting the solar panels, I connect them to the battery. If you’re curious about the finer details, there’s more to explore.
Have questions? Reach out for expert guidance tailored to your needs.
🔗 Get in Touch
Calculate Your Power Load
Calculating your power load is an essential first step in setting up your solar panel system. To begin, I list all devices and appliances I use, checking their wattage and estimating how long each runs daily.
By multiplying the wattage by the hours of use, I can calculate the total energy needed in watt-hours. For example, the average American household consumes about 10,632 kWh annually, or roughly 886 kWh monthly, which serves as a helpful guideline.
Once I know my energy requirements, I can determine how many solar panels I need. Using the formula—Number of panels = Total annual kWh / Production ratio / Panel wattage—helps me plan effectively to install solar panels that meet my energy needs.
Choose Your Solar Panel Array

Selecting the right solar panel array is crucial for maximizing energy production and efficiency. I began by calculating my total energy consumption, using the average American household’s 886 kWh per month as a reference.
To estimate the number of panels I needed, I divided my annual energy requirement by the production ratio and the wattage of the panels, like 400W.
I considered the three main types: monocrystalline for efficiency, polycrystalline for cost, and thin-film for portability.
It’s imperative that the panels I choose are compatible with my other system components, including the inverter and charge controller.
Finally, I assessed local sunlight conditions and potential shading to optimize the placement of my solar panel array for my solar power system.
Select the Solar Panel Type
When it comes to choosing the right solar panel type, I’ve found there are three main options to evaluate: monocrystalline, polycrystalline, and thin-film panels.

Monocrystalline panels offer the highest efficiency, usually between 15-22%, making them ideal if space is limited.
Polycrystalline panels are more affordable but have lower efficiency ratings, typically around 13-16%. Thin-film panels are lightweight and portable, though their efficiency ranges from 7-18%.
When selecting among these types of solar panels, consider the production ratio, which helps determine energy generation based on sunlight exposure.
Think about your installation needs and available space to guarantee you choose the best solar panel type for your situation. This choice will greatly impact your system’s overall performance.
Select the Portable Power Station
After you’ve chosen the right solar panel type, the next step is finding a portable power station that fits your energy needs.
I always recommend looking at the battery type; lithium-ion options typically provide a longer lifespan and better efficiency than lead-acid.
Make sure the power station’s capacity matches your energy needs by checking the watt-hour rating of your devices—overloading could lead to issues.
It’s also essential to choose a portable power station with multiple output options, like AC, USB, and DC ports, for versatility.
Don’t forget to check compatibility with your solar panels installed, ensuring efficient charging. Finally, consider the weight and portability features, as lighter models are easier to transport for outdoor adventures or emergencies.
Purchase the Balance of System
Purchasing the balance of system (BOS) components is an essential step in setting up your solar panel system.
The BOS includes everything you need, excluding the solar panels themselves, like the charge controller, inverter, wiring, and mounting structures.
I recommend starting with a quality charge controller, as it regulates the voltage and current from the panels, preventing battery overcharging.
Don’t overlook the inverter, which converts the direct current (DC) from the panels into alternating current (AC) for your appliances.
You’ll also need reliable wiring, like MC4 connectors, for secure connections. Finally, choose suitable mounting options—ground mounts, roof mounts, or pole mounts—to maximize sun exposure while ensuring everything is structurally sound. This way, you’ll have a complete and efficient solar setup.
Gather the Necessary Tools and Components
With the balance of system components secured, it’s time to gather the necessary tools and components for your solar panel setup.
First, I recommend compiling a checklist that includes solar panels, a charge controller, inverter, batteries, and wiring materials.
Make sure to select the type of solar panels that best fit your needs, like monocrystalline for efficiency or polycrystalline for cost-effectiveness.
For the charge controller, choose one that matches your solar panel and battery specifications—consider options like MPPT for better efficiency.
Don’t forget the tools! You’ll need screwdrivers, wrenches, wire cutters, and safety gear. Ensuring compatibility between all components is essential, especially the inverter’s power rating with your calculated load. Let’s get ready for installation!
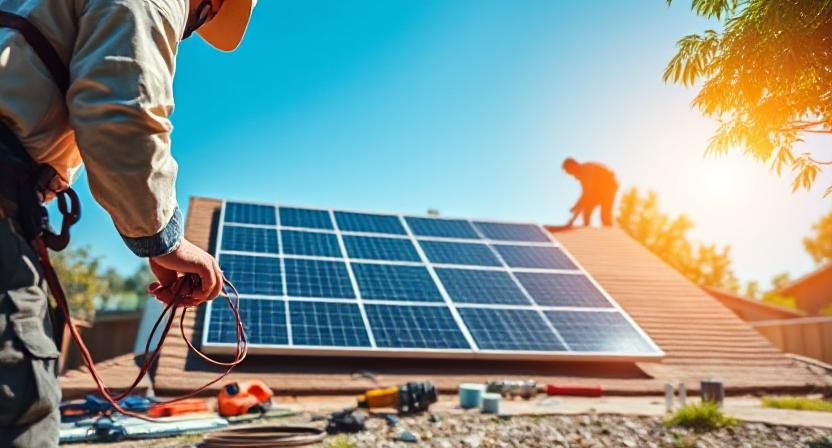
Mount the Solar Panels
Mounting the solar panels is an essential step in your solar panel system setup. First, make sure the mounting structure is stable, whether it’s your roof or the ground, to withstand various weather conditions.
I always orient the solar panels toward the south if I’m in the Northern Hemisphere, or north if I’m in the Southern Hemisphere, for maximum sunlight exposure.
Adjust the tilt angle between 18 to 36 degrees to optimize energy capture throughout the year. It’s vital to use high-quality mounting brackets and hardware to secure the panels properly, ensuring they endure wind and other stresses.
Finally, I double-check that my installation complies with local building codes and regulations to keep everything safe and legal.
Connect the Solar Panels to the Battery
Now that we’ve mounted the solar panels, it’s time to connect them to the battery. I’ll share some important wiring configurations and how to match battery voltages to guarantee everything works smoothly. Plus, I’ll highlight the safety precautions you need to take during this process.
Wiring Configuration Options
When connecting solar panels to a battery, it’s essential to take into account the wiring configuration to guarantee peak performance and safety.
You’ve got a couple of wiring configuration options: series or parallel. In a series setup, you increase voltage, which is great if your battery requires a higher voltage input.
On the other hand, a parallel configuration maintains the same voltage but boosts the current, perfect for systems needing more power.
Regardless of your choice, make sure the total voltage and current ratings match your battery’s specifications to prevent overloading.
Don’t forget to install a charge controller between the solar panels and the battery; it regulates the voltage and current flow, ensuring efficient charging and prolonging battery life.
Battery Voltage Matching
To guarantee a seamless connection between your solar panels and battery, it’s essential that the voltage of the solar panels matches the battery’s voltage rating—commonly 12V, 24V, or 48V.
If the voltages don’t align, you risk damaging your battery and compromising the system’s efficiency. I always recommend using a charge controller to regulate the voltage and current coming from the solar panels, preventing overcharging and extending the battery’s lifespan.
When connecting the panels, remember that series connections increase the voltage, while parallel connections maintain it but boost total current.
Also, make certain the positive terminal of the solar panel connects to the positive terminal of the charge controller. Correct polarity is key to avoiding system failure!
Safety Precautions Required
Connecting solar panels to the battery requires careful attention to safety precautions to avoid damaging your system.
First, make sure the solar panels are covered or disconnected from sunlight to prevent high voltage damage during installation.
Always match positive (+) and negative (-) terminals when you connect the solar panels to avoid reverse polarity, which can harm your components.
Use appropriately sized and insulated wiring to handle the current load, minimizing the risk of overheating and electrical fires.
It’s essential to connect the charge controller to the battery before anything else, as it regulates voltage and prevents overcharging.
Finally, regularly inspect all connections for signs of corrosion or damage to maintain safety and efficiency in your solar power system.